Monday, February 3, 2014

15mm Fantasy Skirmish Round 2 Playtesting

Over the long weekend I had due to school closings, Archer and I played a couple more games, continuing to test the skirmish rule I have developed.  I decided to pull out some really fantastic ruin pieces I purchased from Crescent Root Studio years ago.  These were designed for 28mm but work perfectly for 15mm.


Ruined City
 For this game Archer chose to play the adventurers.  He took a paladin, a fighter, a ranger, a cleric, a druid, a wizard, a dwarf barbarian, and an elf assassin.  This gave him 3 close combat warriors, 2 long range figures, and 3 spellcasters.  After learning the dangers of splitting a small party in the previous game, he set his figures up closer together.

The Adventurers

 I took a force of troglodytes, led by a naga and its hook horror bodyguard.  I absolutely love these troglodyte figures and can’t wait for them to be released for the general public in a few weeks (the naga and hook horror will be in a second dungeon set coming later this spring).  The trogs had two powerful warriors, a wizard, 8 standard warriors, and a guardian lizard.  The naga was a powerful spellcaster and the hook horror was a strong melee presence. 

Troglodytes


The trog force split their force with 2 warriors, the chieftain, the naga and the hook horror on the left flank and the rest of the force on the right flank, moving down the center of the street.


Troglodyte Left Flank
Troglodyte Right Flank


In the opening moves the adventurers decided to stay together and set out down the left flank towards the smaller, but stronger, force of trogs.  The wizard moved out to the front with the assassin flanking him in order to get some early spells in play.


Opening Moves


Falling into the trap of over confidence, the trogs moved too far up and immediately lost 2 warriors to a well placed fireball, which the chieftain managed to survive with minimal burns.   The ranger placed a well shot arrow through the eye of the hook horror, dropping him before he could reach the melee.


Fireball!


Unfortunately for the adventurers, the guardian lizard moved more quickly than anticipated on the right flank and charged the druid, who was bringing up the rear with the cleric.  The fight was quick and bloody and suddenly the adventurers were down a spellcaster.


Fallen Druid


Another group of troglodytes moved down a center alley, hoping for an opportunity to strike at the wizard and were met by the chieftain, who dashed across the rubble strewn courtyard to reach the safety of the alleyway.


Sneaking up on a Wizard

The naga stayed in the cover of a large piece of rubble, hoping for a good opportunity to unleash his arsenal of spells.

The Naga

The next turn brought a lot of action.  The troglodytes won initiative and charged the adventurers from two directions.  The troglodyte brute rushed the cleric, who had hoped to heal the druid but ran out of time.  The guardian lizard charged the assassin; the fighter was attacked from the flank and the front, and the ranger was rushed by the troglodyte chieftain.  


A Bloody Fight!

Four troglodyte warriors moved into position for a later charge.


Troglodyte Right Flank Moves in

After this round of combat, the situation looked dire for the adventurers.  The assassin managed to kill the guardian lizard, but the cleric was smashed down by the troglodyte brute.  Though the fighter eliminated the foe to his front, he fell to the foe on his flank.  The troglodyte chieftain dropped the ranger and suddenly the adventurers only had 4 models left. 

Archer, refusing to break player morale, seized the initiative and turned a tough situation around.  His dwarf barbarian yelled his defiance and charged a troglodyte warrior while the paladin used a heal spell to put the ranger back into play.  The elf assassin charged the troglodyte wizard, who had gotten too close to the combat.  In the game saving move, however, the wizard cast a wall of fire, blocking the troglodyte brute and the four warriors from being able to move into the rear and flank of the adventurers. 

We Have a Chance!
 Brilliantly (and luckily) winning the initiative the next turn allowed the adventurers to go a second time before the troglodytes could move. The paladin and barbarian teamed up on the troglodyte chieftain while the ranger moved into position to shoot at the naga.  The elf assassin continued to fight the wizard, who had managed to survive one round of combat. 
 

The Fight Continues
Suddenly, the situation looked grim for the troglodytes and naga as the chieftain and wizard both fell, though the adventurers lost the paladin as well.


Die Monsters!

Not to be taken for granted, however, the nage moved into range and unleashed a fireball of its own, killing the ranger but only slightly burning the assassin and dwarf. 


The Naga's Fireball
Winning initiative and being out of spell points, the naga decided to run away and called to his remaining forces to cover his getaway.  The adventurers moved into position for the next wave of troglodytes, who would be charging once the firewall dissipated.  The elf assassin used the cover of a building and a handy window to shoot at the troglodytes, without effect.


The Assassin Shoots
When the final assault came it was brutal.  The troglodyte brute fell before the dwarf and elf assassin, while the wizard cowered in the corner out of spell points.  


The Brute Falls

The final four troglodyte warriors fell beforet the elf and dwarf but not before fatally wounding the elf assassin.

A Grim Situation for the Assassin


End Game

Overall, I am very happy with how these rules are playing and will begin playtesting with two warbands against each other as opposed to a warband vs adventurers. 

In the coming weeks, I will be posting and asking for playtesters.  For now, it is just nice to be playing some games!


Thursday, January 30, 2014

New Skirmish Game Battle Report


Over the last few months I have been messing around with a set of fantasy skirmish rules, taking the best of other systems I like and seeing if I can make them work all together.  The goal is to have something relatively easy for my 8 year old to play but also interesting enough to run at cons or game nights.  I plan on releasing it with stats for the Splintered Light Miniatures range of fantasy and rpg figures.

First Game 2'x4' Map and Archer
I decided to take the 2 snow days we had to try a couple of games with my son Archer.  Though I will need to let other experienced players play test, these two run throughs with Archer did quickly reveal some glaring problems and allow a few fixes.

The two games we played were between a group of adventurers and a tribe of orcs and goblins, with a hill giant thrown into the mix.

The adventurers had 2 wizards, a fighter, a barbarian, a cleric, a bard, a thief, and a ranger.

Adventurers
The orcs had an orc chieftain, an orc wizard, 5 orc warriors, 2 orc heavies, 2 orc archers, 5 goblins, and 1 hill giant.

Orc and Goblin Force
The first game was fun but I made so many mid game changes and realized so many problems that I am not going to do any sort of battle report.  Here is a greatest hits set of images, however.  All I will say is that the adventurers got slaughtered!

Orc Archer vs Bard

Fighter vs Orc Heavy

Hill Giant vs Barbarian

The second game took place on a 2’x2’ mat, with each force setting up 6’ in.  Archer was playing the adventurers and chose to split them in half, which proved to be a mistake against the foe who outnumbered them 2 to 1.

2nd Game Opening Moves

The early turns saw the orcs moving forward.  The adventurer group with the ranger, a wizard, the thief, and the barbarian took to the hill on the left flank. The ranger took his first longbow shot at the hill giant and then the second turn decided to eliminate an orc warrior, which worked much better.  


The Left Flank

The other adventurer group with the fighter, the bard, the cleric, and a wizard slowly moved forward on the right flank.  


Right Flank
The female wizard cast a wall of fire, not only blocking the orc archers, who had taken some long range shot from the hill, but actually incinerating them by landing it on them.

Firewall Destroys Orc Archers
As the hill giant, goblins, and a few orc warriors moved against the group on the hill, the wizard launched a fireball, delivering a massive wound to the hill giant and deep frying a goblin.  The ranger then put the hill giant out of his misery with a well placed arrow.  The adventurers were off to a strong start.

Fireball!
On the other side, however, the battle was not going so well.  The orc wizard began by charming the fighter, who took a swing at the cleric to no effect.  The orc wizard then cast her own fireball the next turn, blasting not only the bard but the fighter as well. 

Payback!
The orc chieftain and his bodyguard charged forward and made quick work of the cleric and wizard.


The Right Flank Collapses


Moving back to the hill, the adventurers successfully fought off the attack of goblin and orc warriors.  The thief amazingly held the left flank, eliminating the first goblin he faced and then moving in the next turn to relieve the ranger, who was facing two goblins.

The Ranger and Thief Hold The Left
The barbarian did not fare as well.  Though he did manage to slay one orc warrior, the one on his flank buried an axe in his head, dropping him.  The wizard managed to freeze the orc with a spell until the ranger and thief could take him out. 

The Barbarian Valiantly Takes on Two Orcs

 The orcs from the flank then moved to eliminate the adventurers on the hill.  The orc wizard made the mistake of moving too far to the flank, allowing the thief to charge her and kill her while the wizard protecting him and delayed the orc force by casting a wall of fire, which failed to kill the orc heavy it landed on.  The ranger shot the orc warrior on the wrong side of the fire wall and the three heroes waited for the orc assault on the hill.

Firewall!

Unfortunately, the assault was brutal when it came with the orcs hammering down the wizard and the ranger.  The thief, seeing the carnage and four remaining orcs, decided to run and live to fight another day.

This Is the End!


Overall, I am really pleased with how the first runs at the rules went.  I will be continuing to playtest and tweak and work with Archer on strategy, but I think I am on the right track!


Thursday, December 26, 2013

End of Year Sale Special Offer

Merry Christmas and Happy New Year!  For this final week of 2013, I will be offering the following for everyone who spends $100 or more after the sale price has been discounted (and not including shipping)--a chance to win a preview pack of some of our items being released in 2014.

The first item someone might win is a pack of our forthcoming Troglodytes.  This pack comes with 12 figures and was sculpted by Faron Betchley.  It includes 1 chieftain, 1 hero, 1 shaman, 1 guard lizard, and 8 troopers.

Troglodyte Warband
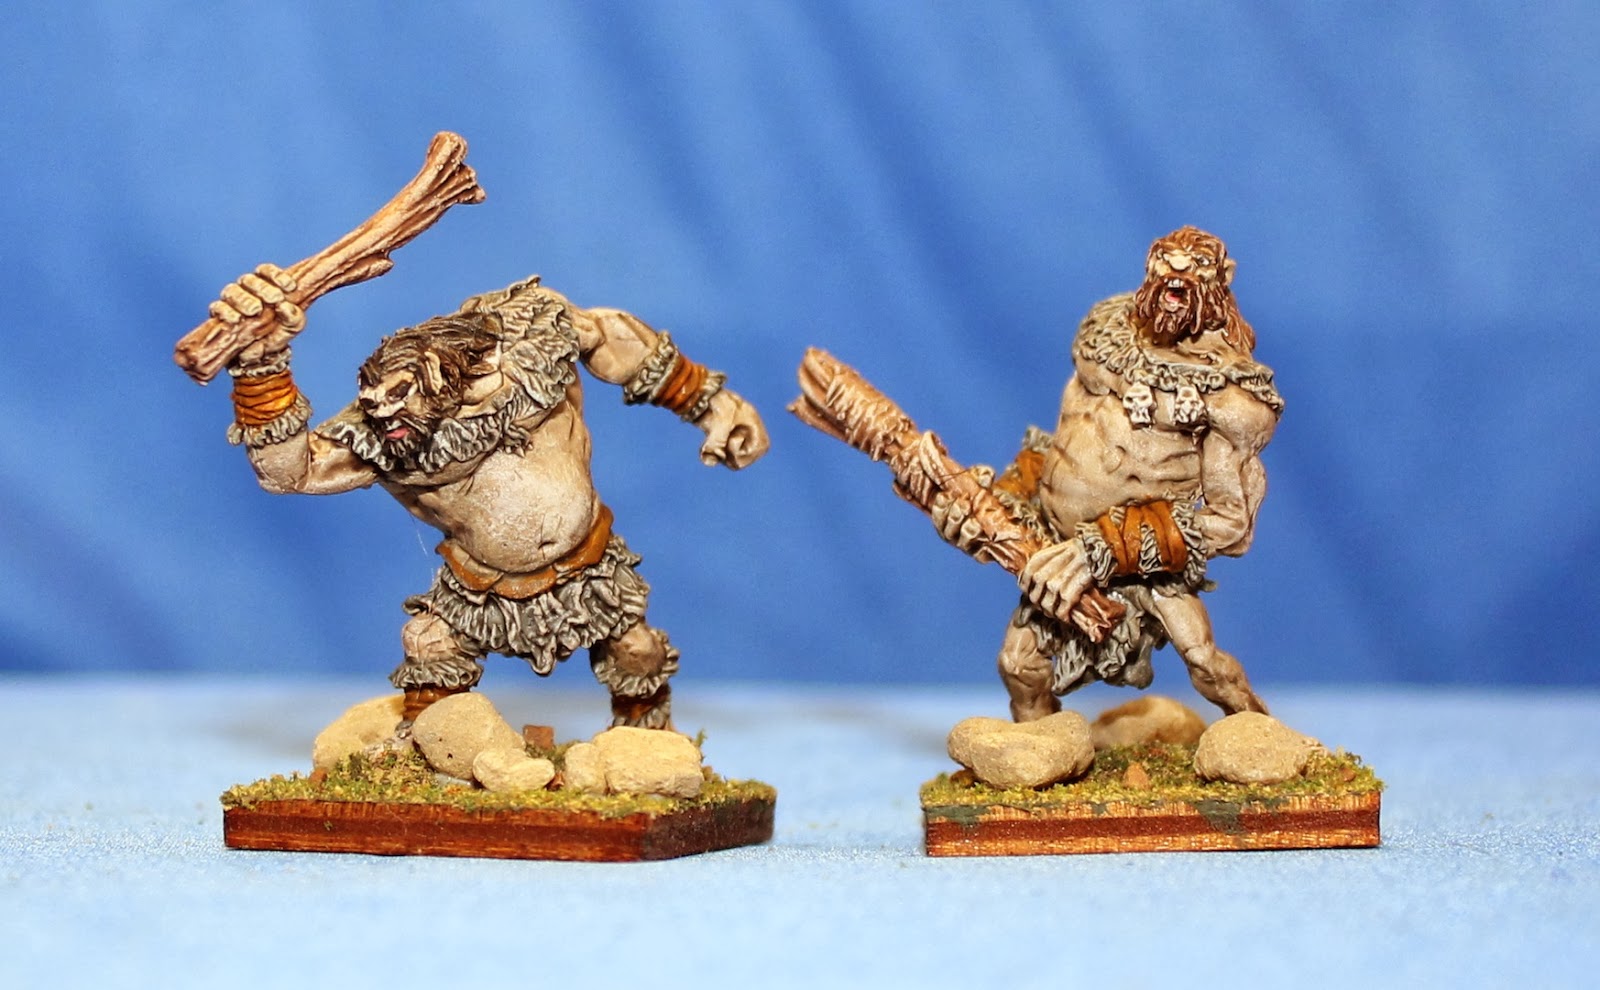
The second item is a pair of Hill Giants, sculpted by Ben Siens.

Hill Giants
The third item is three dungeon monsters designed by Archer McBride (age 8) and sculpted by Faron Betchley.  These three figures are based on classic dungeon crawl monsters.

Carrion Crawler, Naga, Hook Horror.  
Each $100 spent will qualify the customer for a chance to win one of these sets.  The drawing will happen New Years day and winners will be notified via email.  If you ordered from me in the last week, please feel free to notify me that you would like to add to your order to increase it to $100.  If your order was over $100 in the last week, you are qualified to win.

Also, for those who qualify for the drawing, I will be holding your order until January 2.  If this is a problem, please let me know.

All of the figures won will come unpainted.

Thanks for another great year!

Saturday, December 7, 2013

New Packs Available!

I am really excited to announce the release of some new packs in several of our existing lines.

First, in the 15mm RPG area we have a Dungeon Encounters set, which includes figures similar to a roper, a beholder, a mind flayer, a shrieker, a gargoyle, a medusa, and an umber hulk.  These were all sculpted by Faron Betchley, who also did most of our player character figures.

Dungeon Encounters 1
Next, we have a new pack of ratmen.  The ratmen guards are a little bit taller than the warriors and will be an intimidating force in any ratmen army. They were sculpted by Ben Siens.

Rat Guard
We also have a new pack of 20mm Woodland Warriors.  This fourth pack of good heroes provides 2 shrew heroes, a mole hero, a hedgehog cellar keeper and a squirrel ranger.  They were sculpted by Bob Olley.

Woodland Heroes 4
The Sons of Horus have some heavy hitters in the form of gryphon cavalry.  Each pack contains 5 figures with spear plus a leader with a sword.  These were sculpted by Rodrick Campbell.

Sons of Horus Cavalry
Finally, we have three new animal/creature packs, which include a pack of pegasus, unicorns, and elven dogs.  These were sculpted by Rodrick Campbell and Faron Betchley.

Unicorns Standing

Pegasus 
Elven Dogs
You can see all of these at www.splinteredlightminis.com and get them at 20% along with everything else in our store as part of the end of the year sale.  Just enter SLM13 at checkout to receive the discount.